


Learning blockchain can be intimidating and the learning curve can be very steep. Stellar makes it easier IMO.
With this article, I hope to help you gain a better understanding of how the stellar blockchain network works. My only hope is to inspire you to learn blockchain and be excited about the technology.
Stellar is a distributed ledger technology that allows anyone to build low-cost and fast financial services. Stellar has some of the best documentation and tutorials to help a blockchain developer get started quickly.
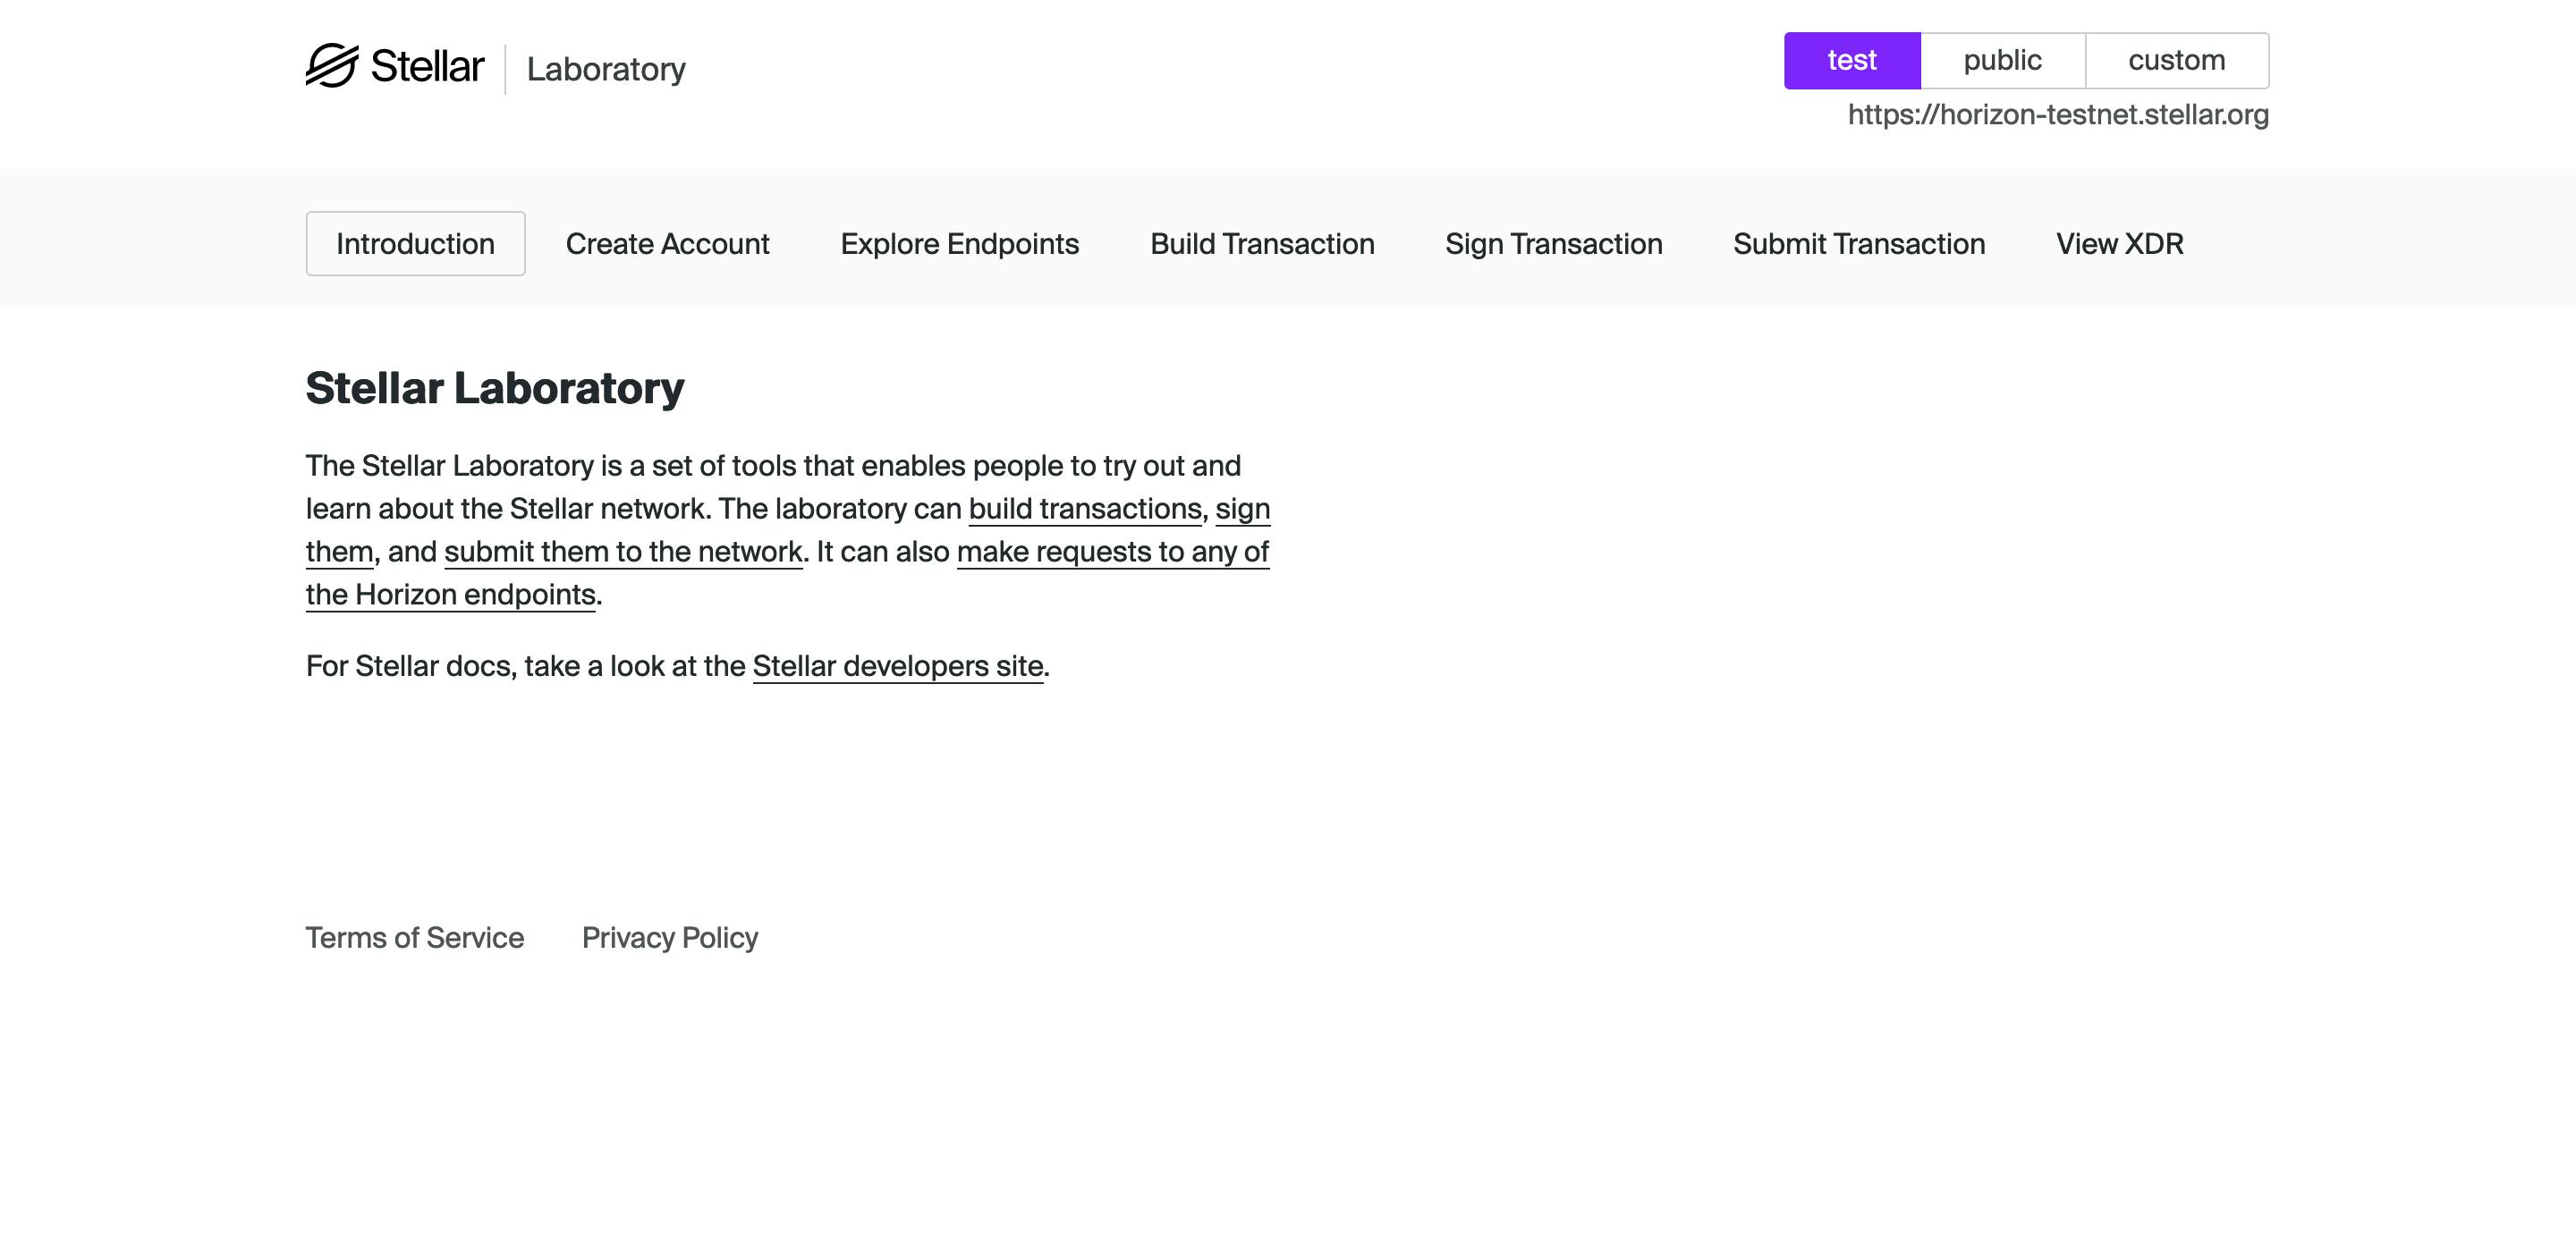
The stellar laboratory is the best place to explore the stellar ecosystem and how the technology works. It allows us to connect to the stellar server.
The Stellar Laboratory is a set of tools that enables people to try out and learn about the Stellar network. The laboratory can build transactions, sign them, and submit them to the network. It can also make requests to any of the Horizon endpoints.
This article will have four key steps:
Step 1: Create two stellar accounts
Step 2: Create a trustline between the issuer and distributor accounts
Step 3: Prevent the issuer from making more tokens
Step 4: Distribution of the tokens
Okay folks let's get our hands dirty 🙂🔥
Step 1: Create two stellar accounts
The first step is setting up two accounts on Stellar one for issuing tokens and the other for distributing tokens.
Firstly, lets navigate to stellar laboratory and select the stellar test server https://horizon-testnet.stellar.org to allow us to work in a test environment.

Next, we will set up the two test accounts one for the issuer account and another for the distributor account. This can be done by clicking the generate key pair. This will output a public and private key for one account. Repeat the process for the second account.
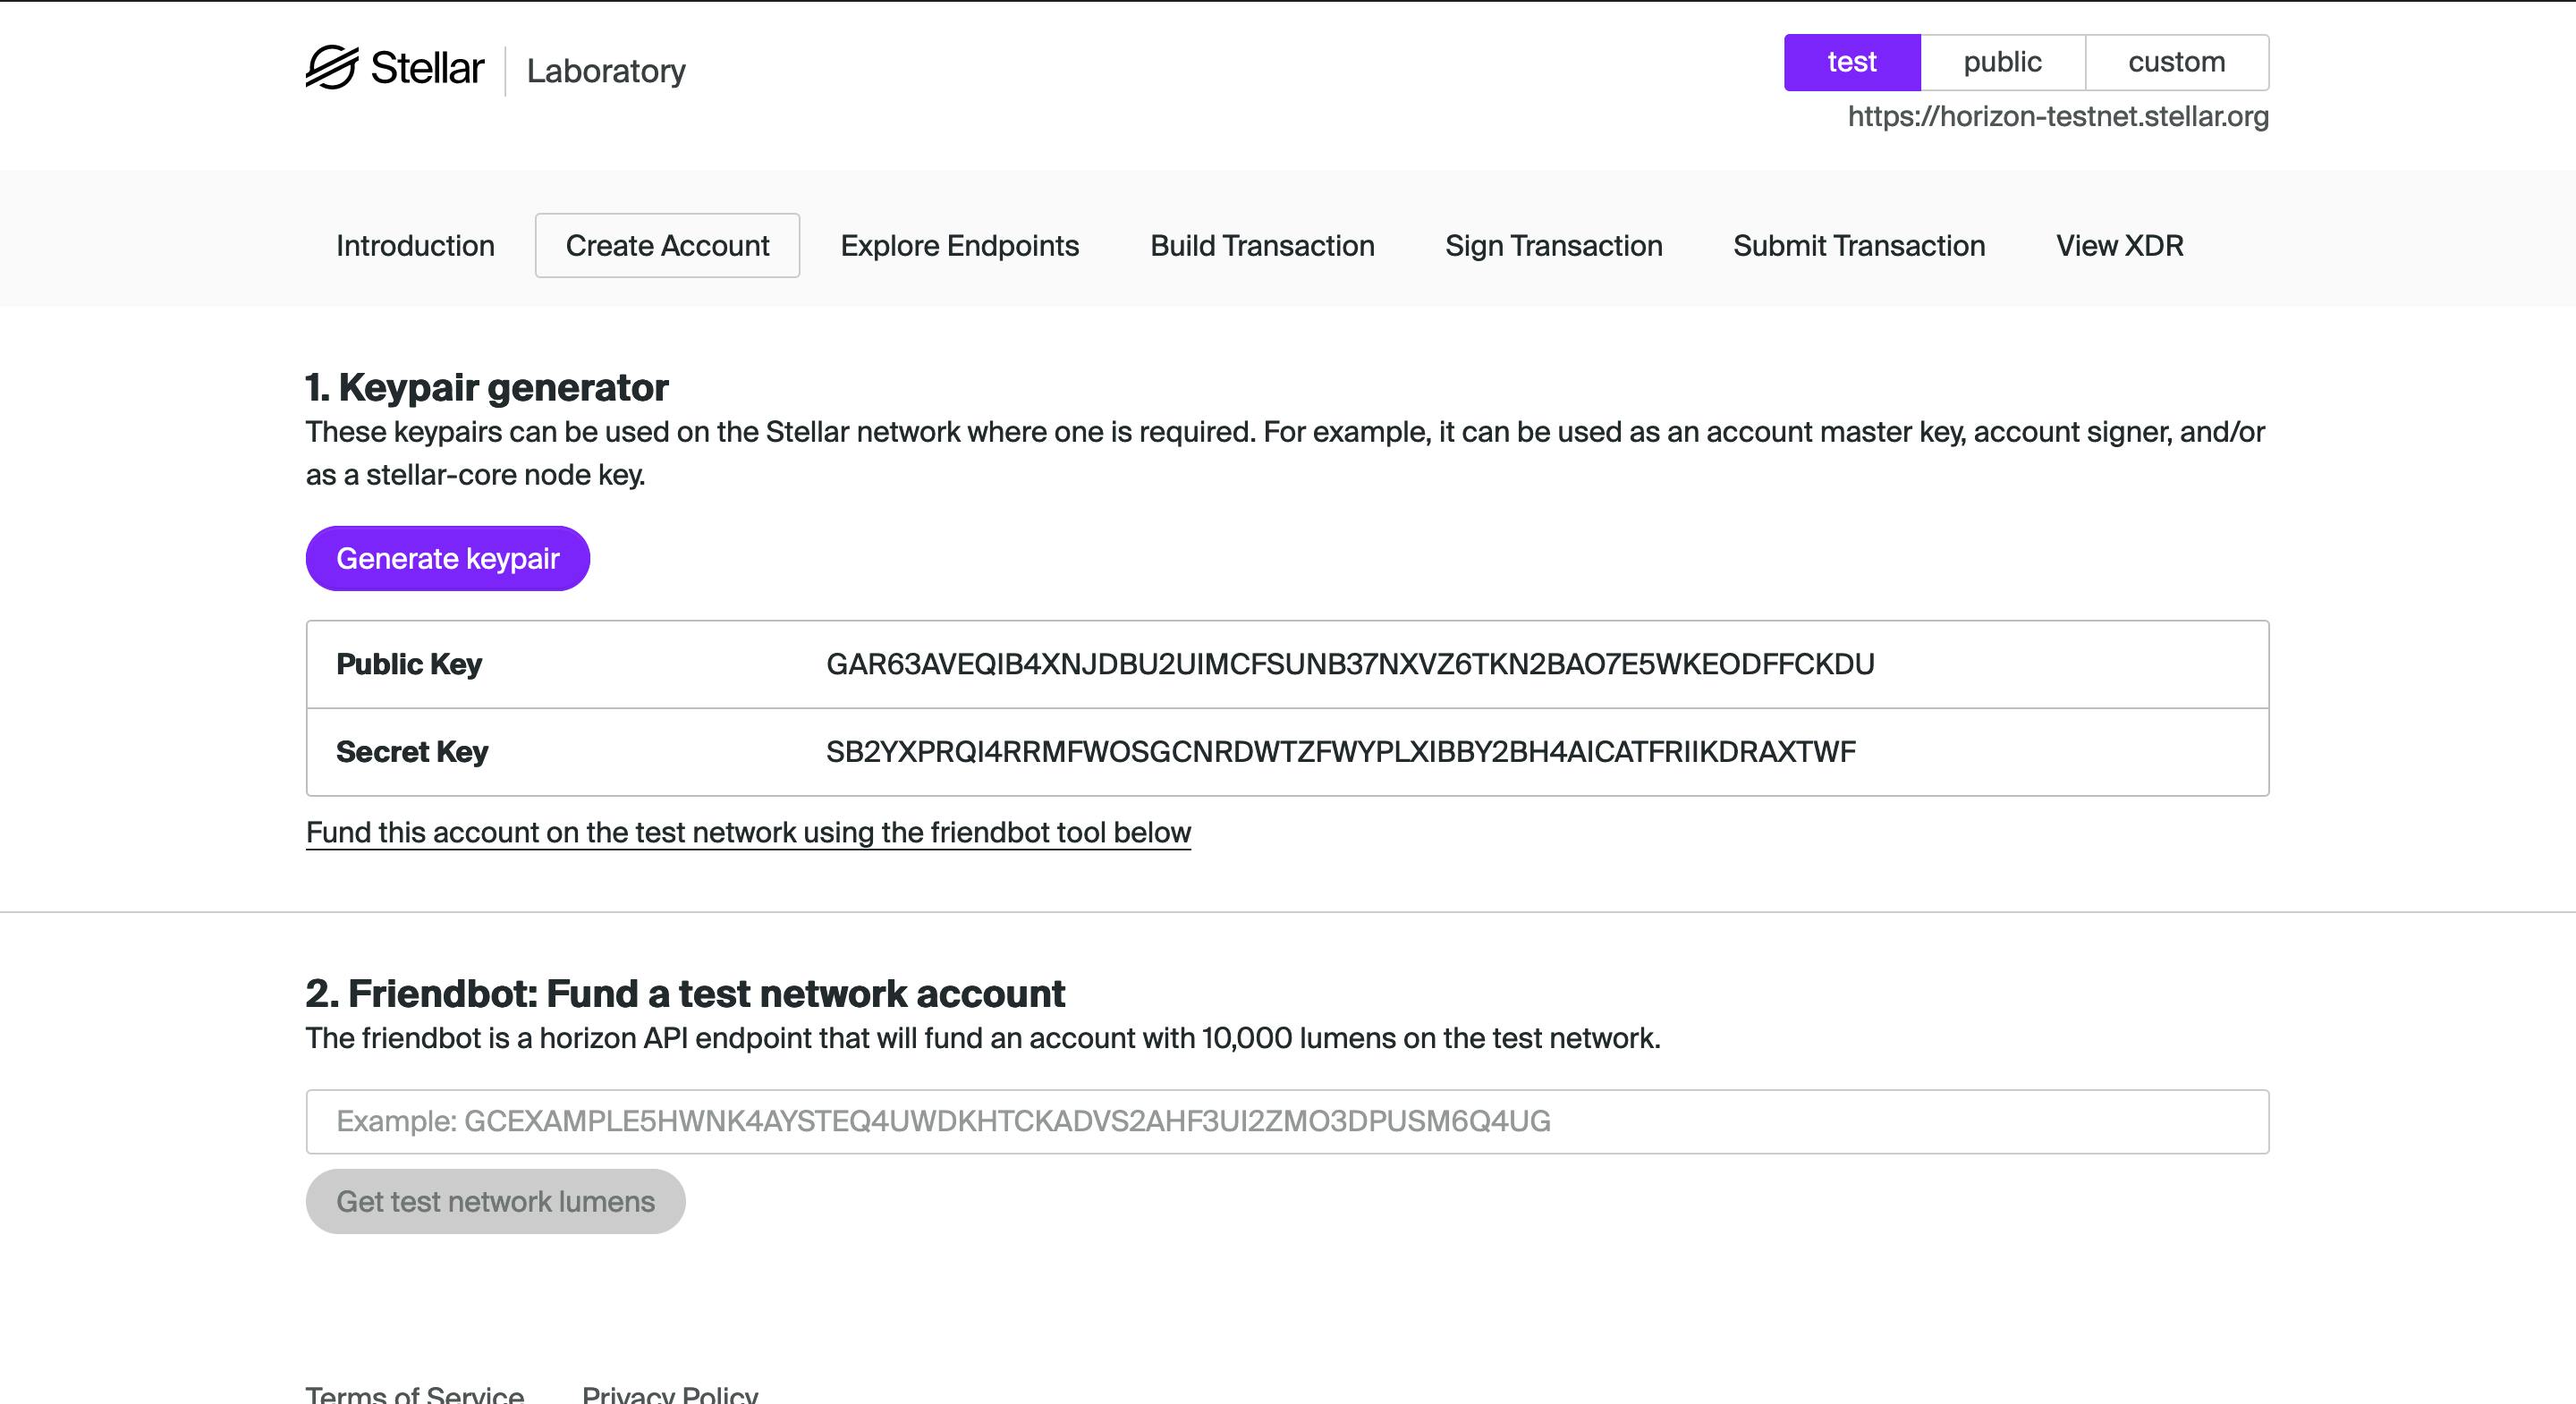
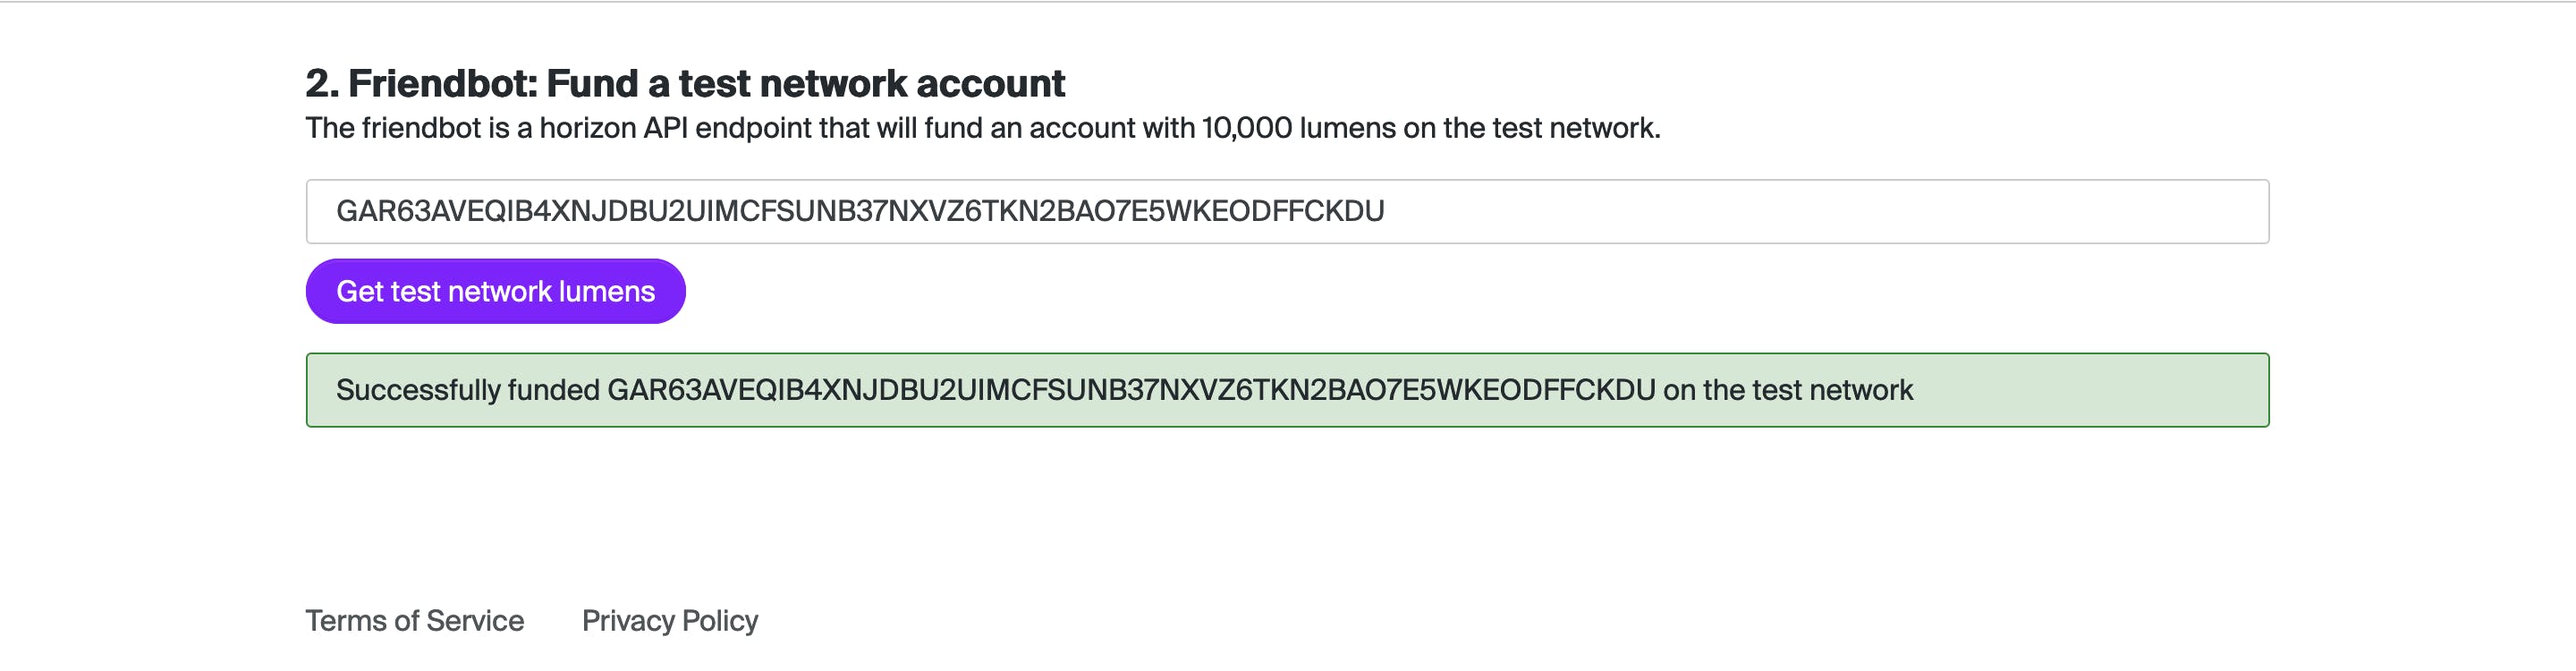
Lastly, we will fund both accounts with 10000 lumens on the test network. You can do this by clicking the Get test network lumens button. Lumens are native tokens in the Stellar network and you can read more on lumens here.
Step 2: Create a trustline between the issuer and distributor accounts
The second step is about setting up a trustline between the issuer of tokens and the distributor. A Trustline in Stellar explicitly implies that the distribution account trusts the issuing account with the handling of the assets issued.
Firstly , we change tabs and go on the Build Transaction page. The transaction builder lets us build a new Stellar transaction on the Stellar Network.

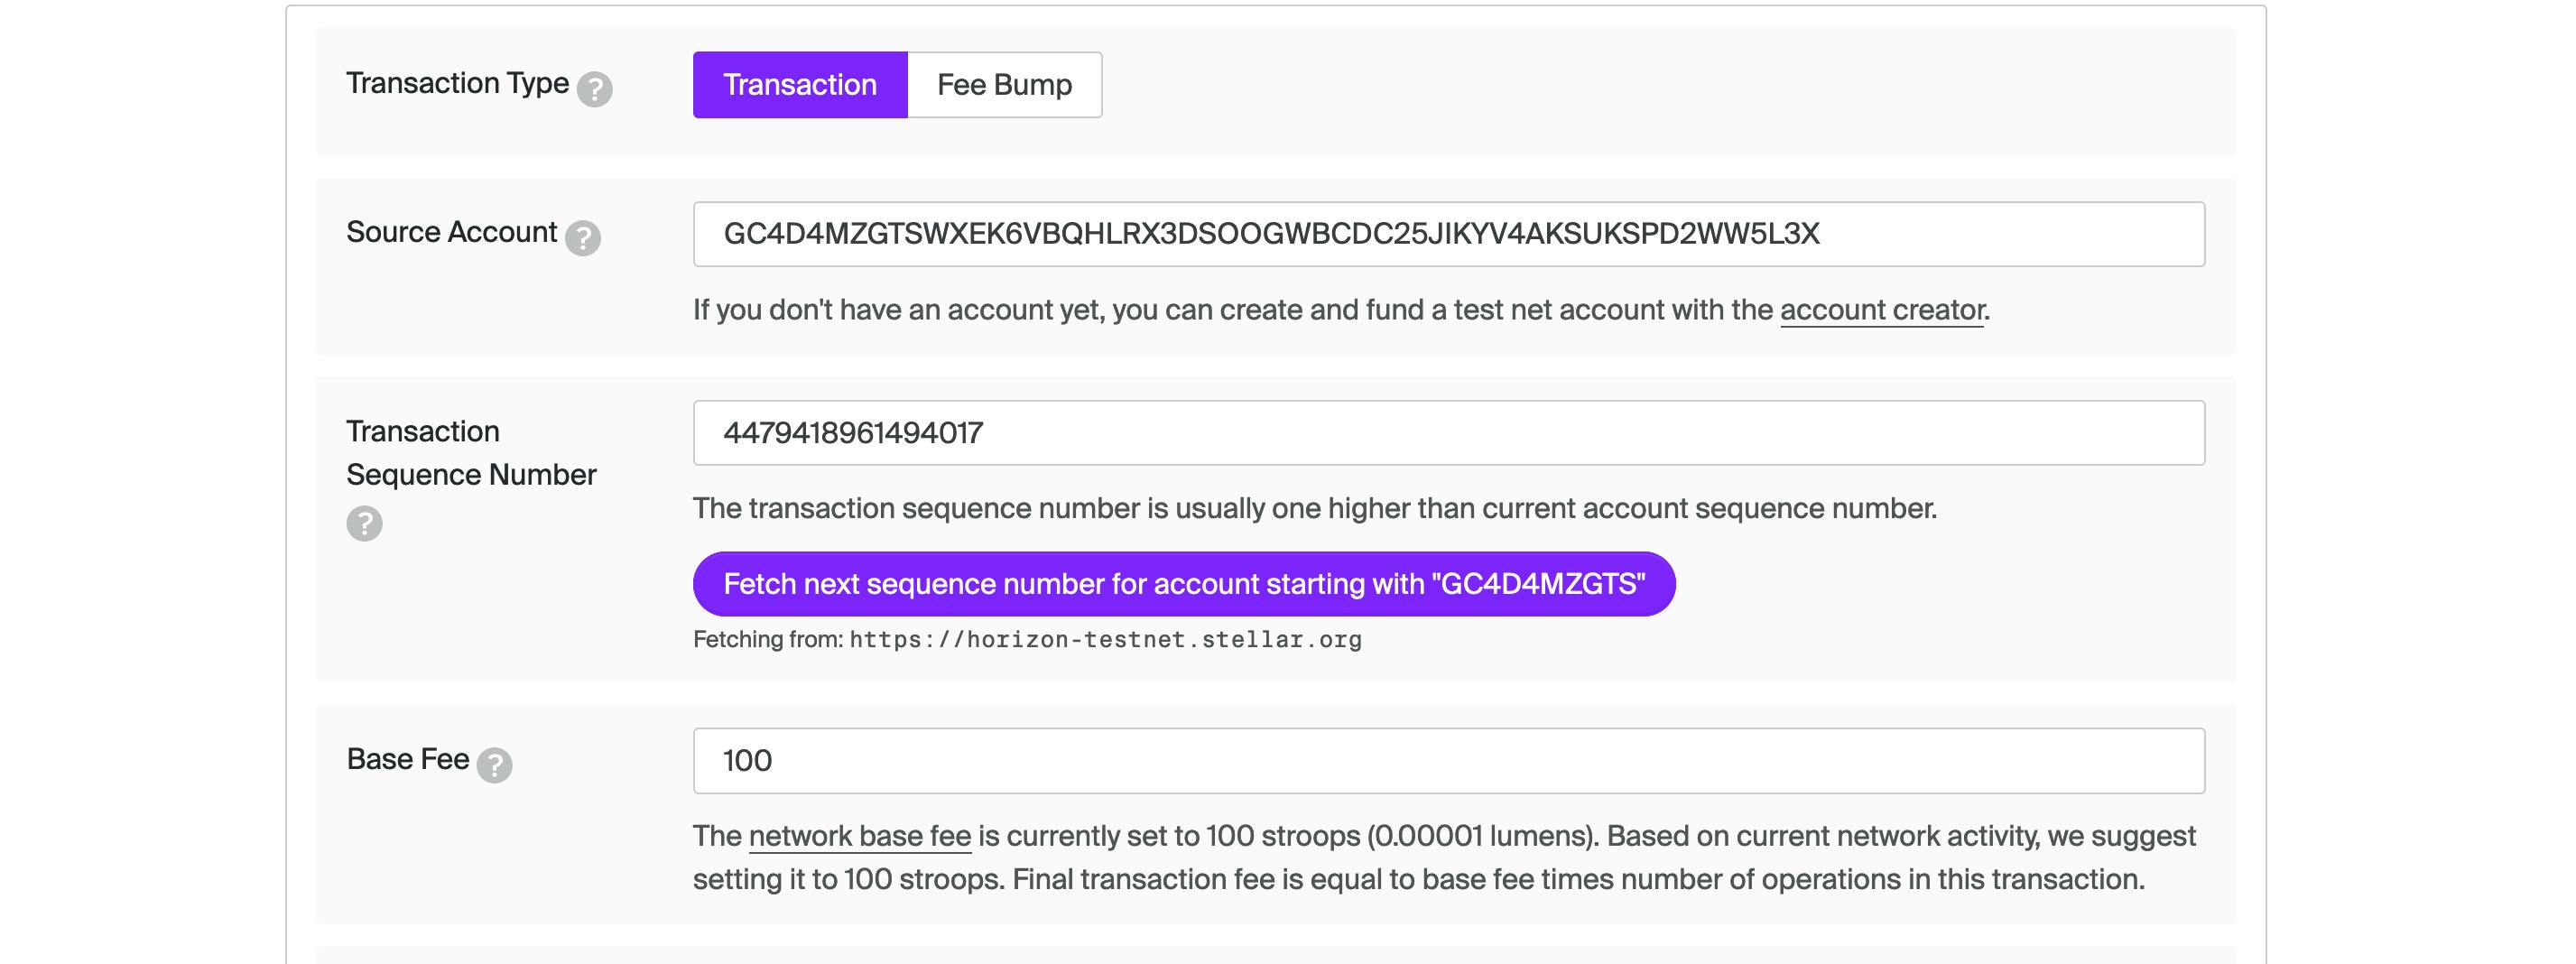
We add the distributor public id into the Source Account field.
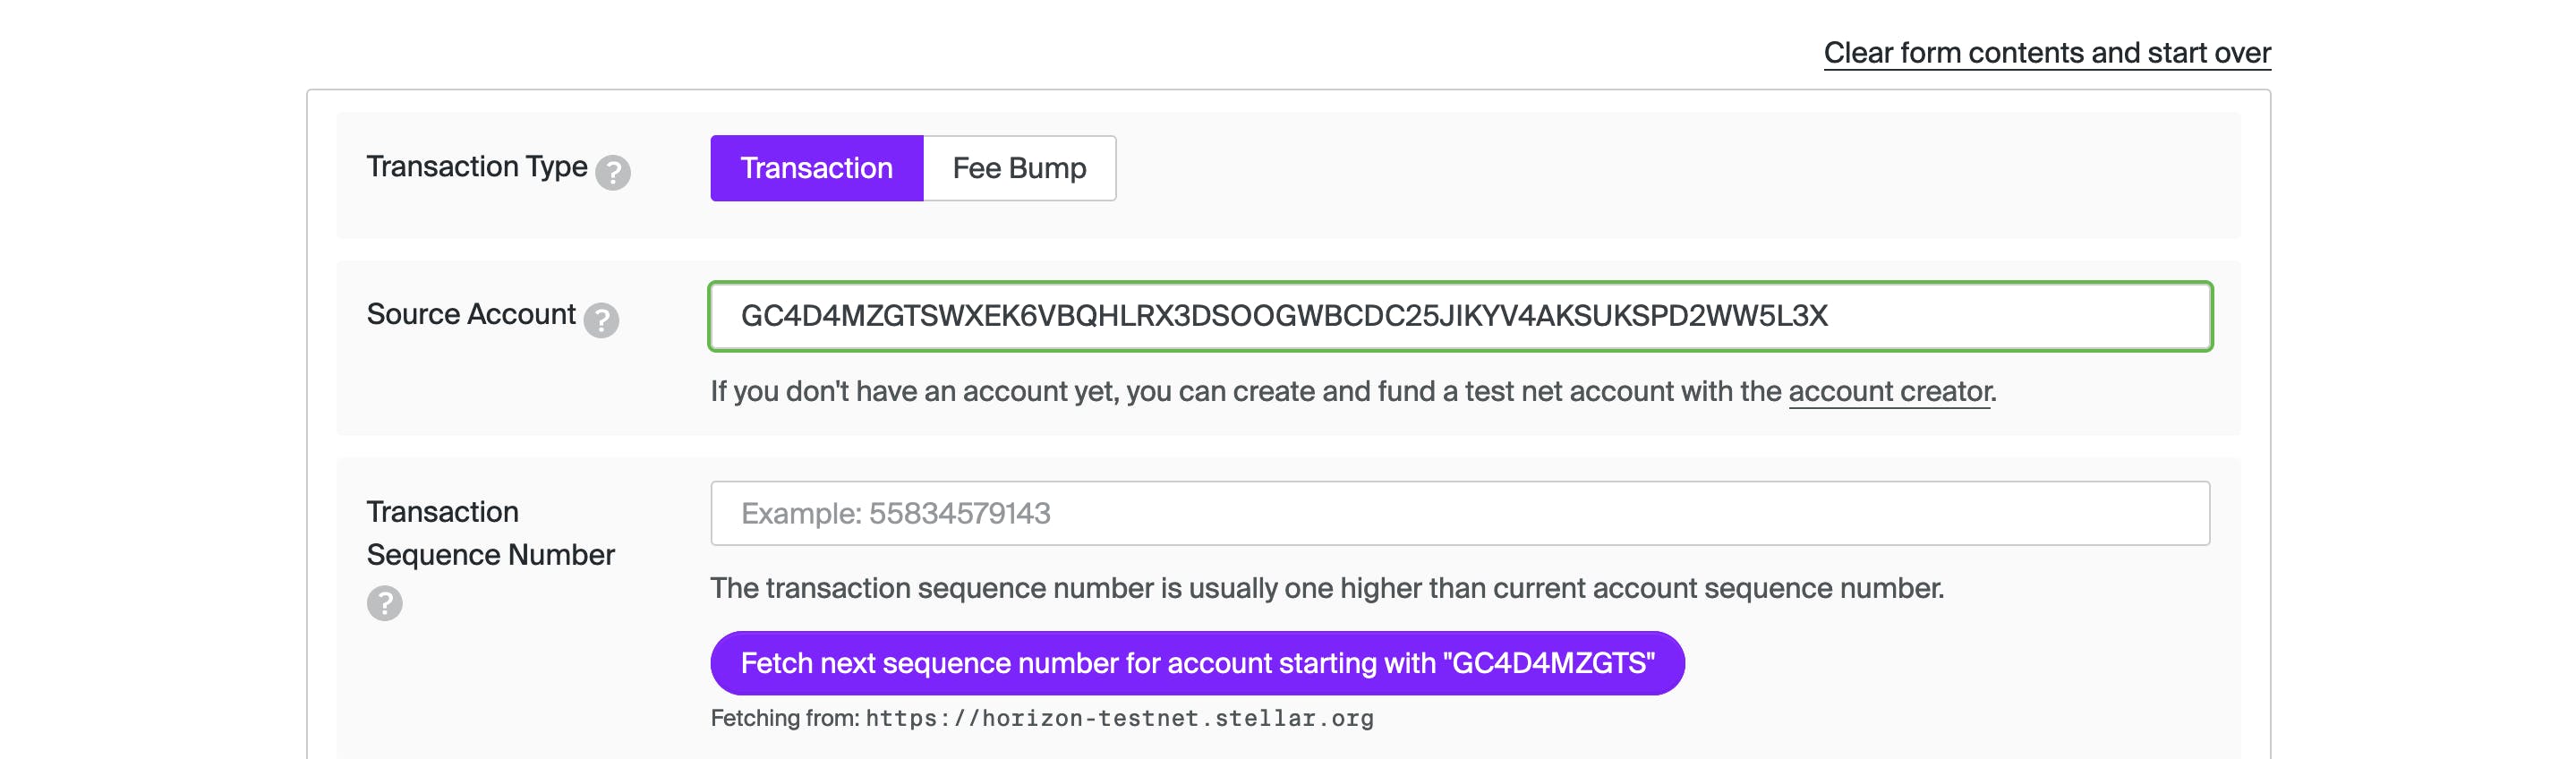
And then we click the Fetch next sequence number for account starting with "XXXXXXXX" button .
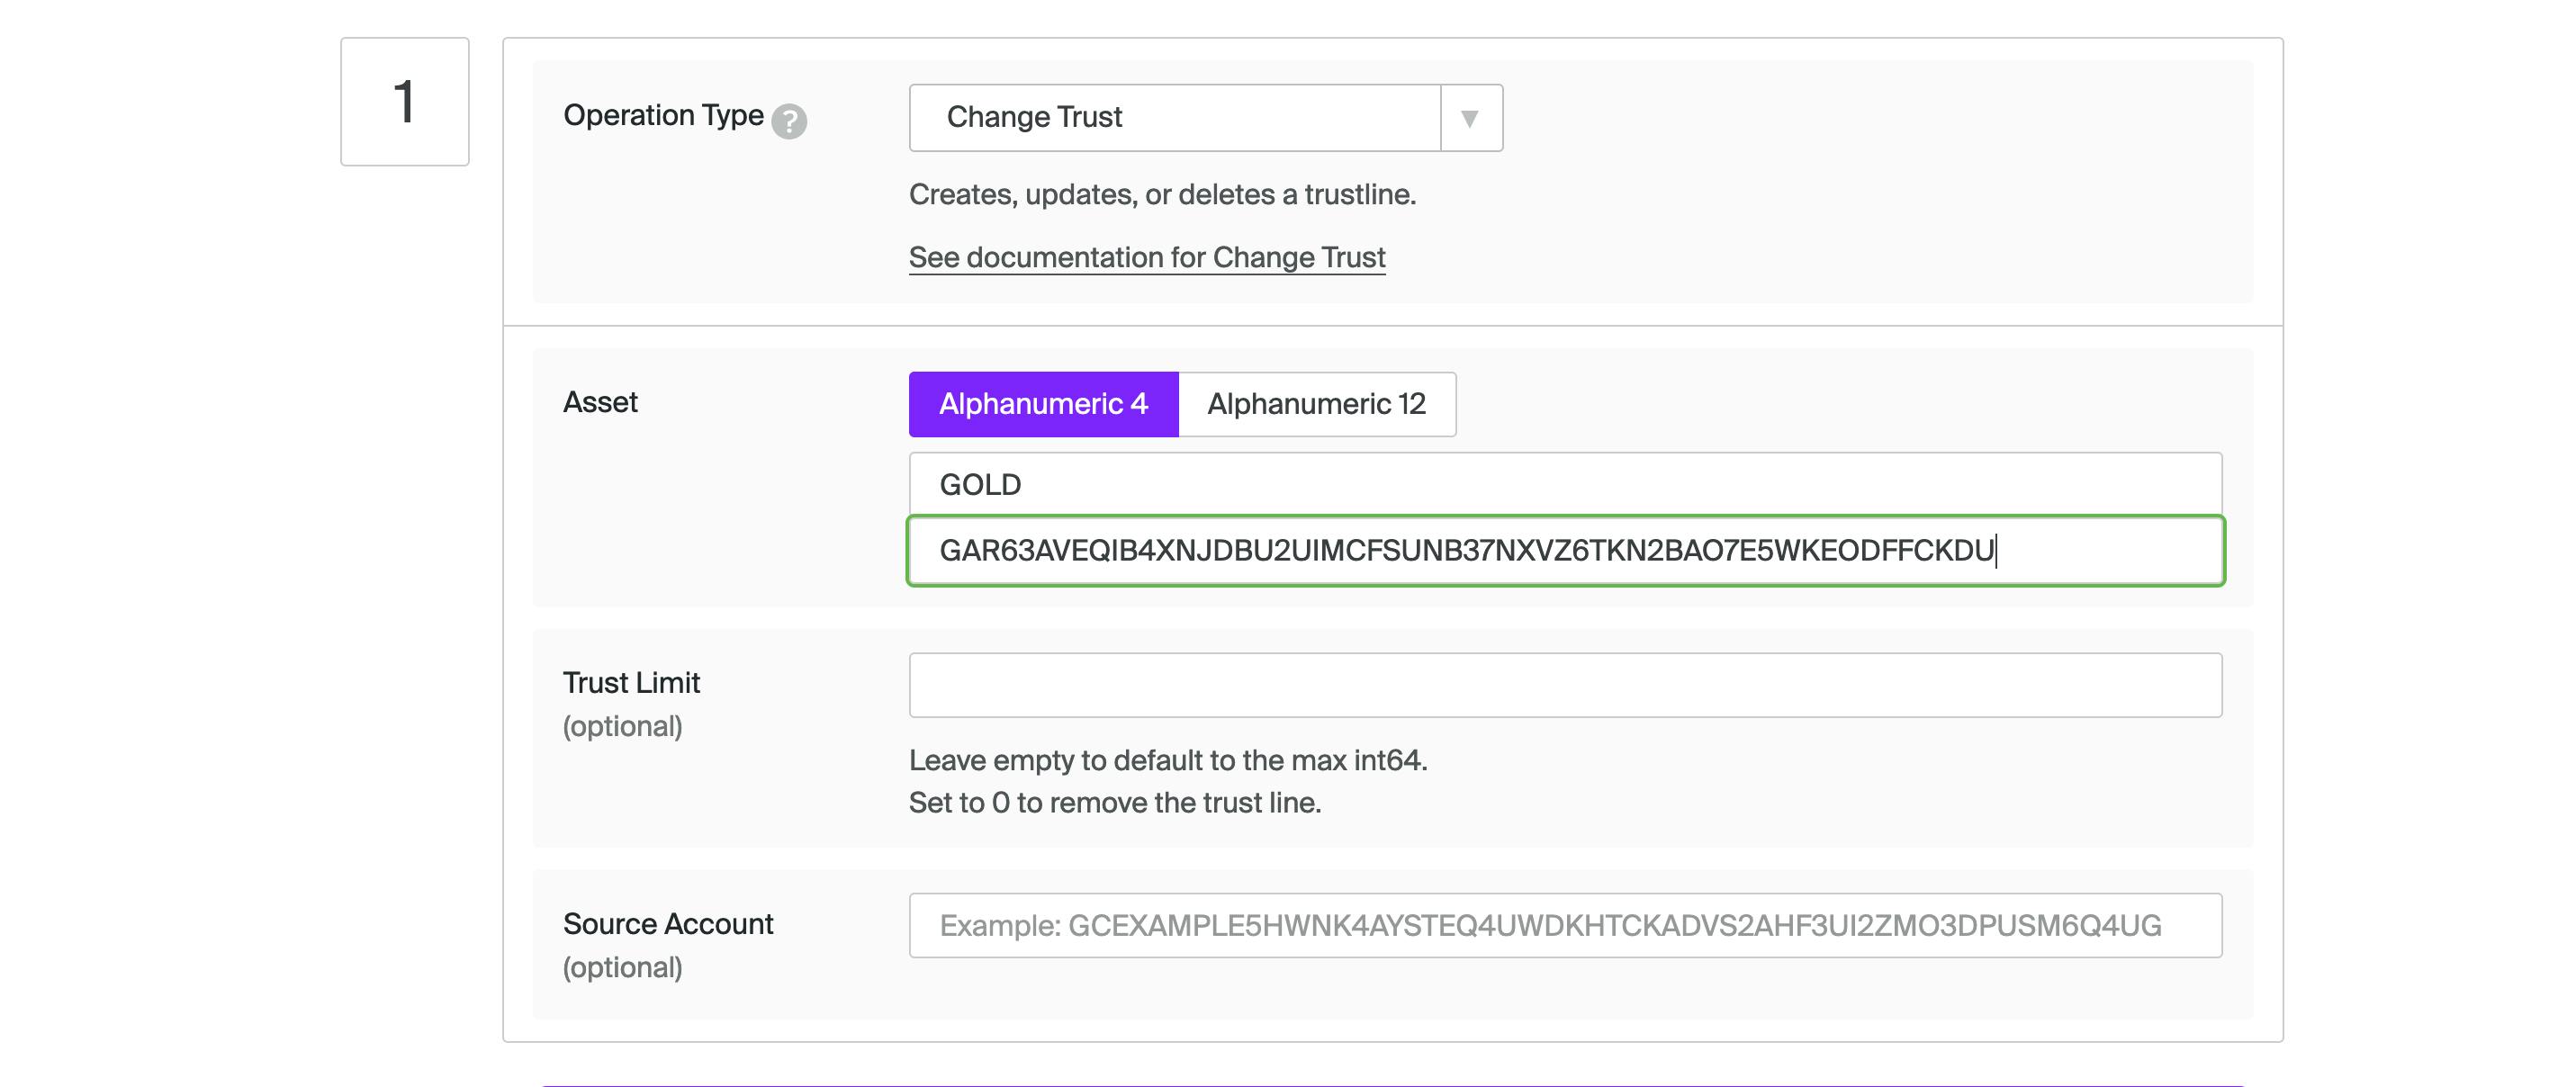
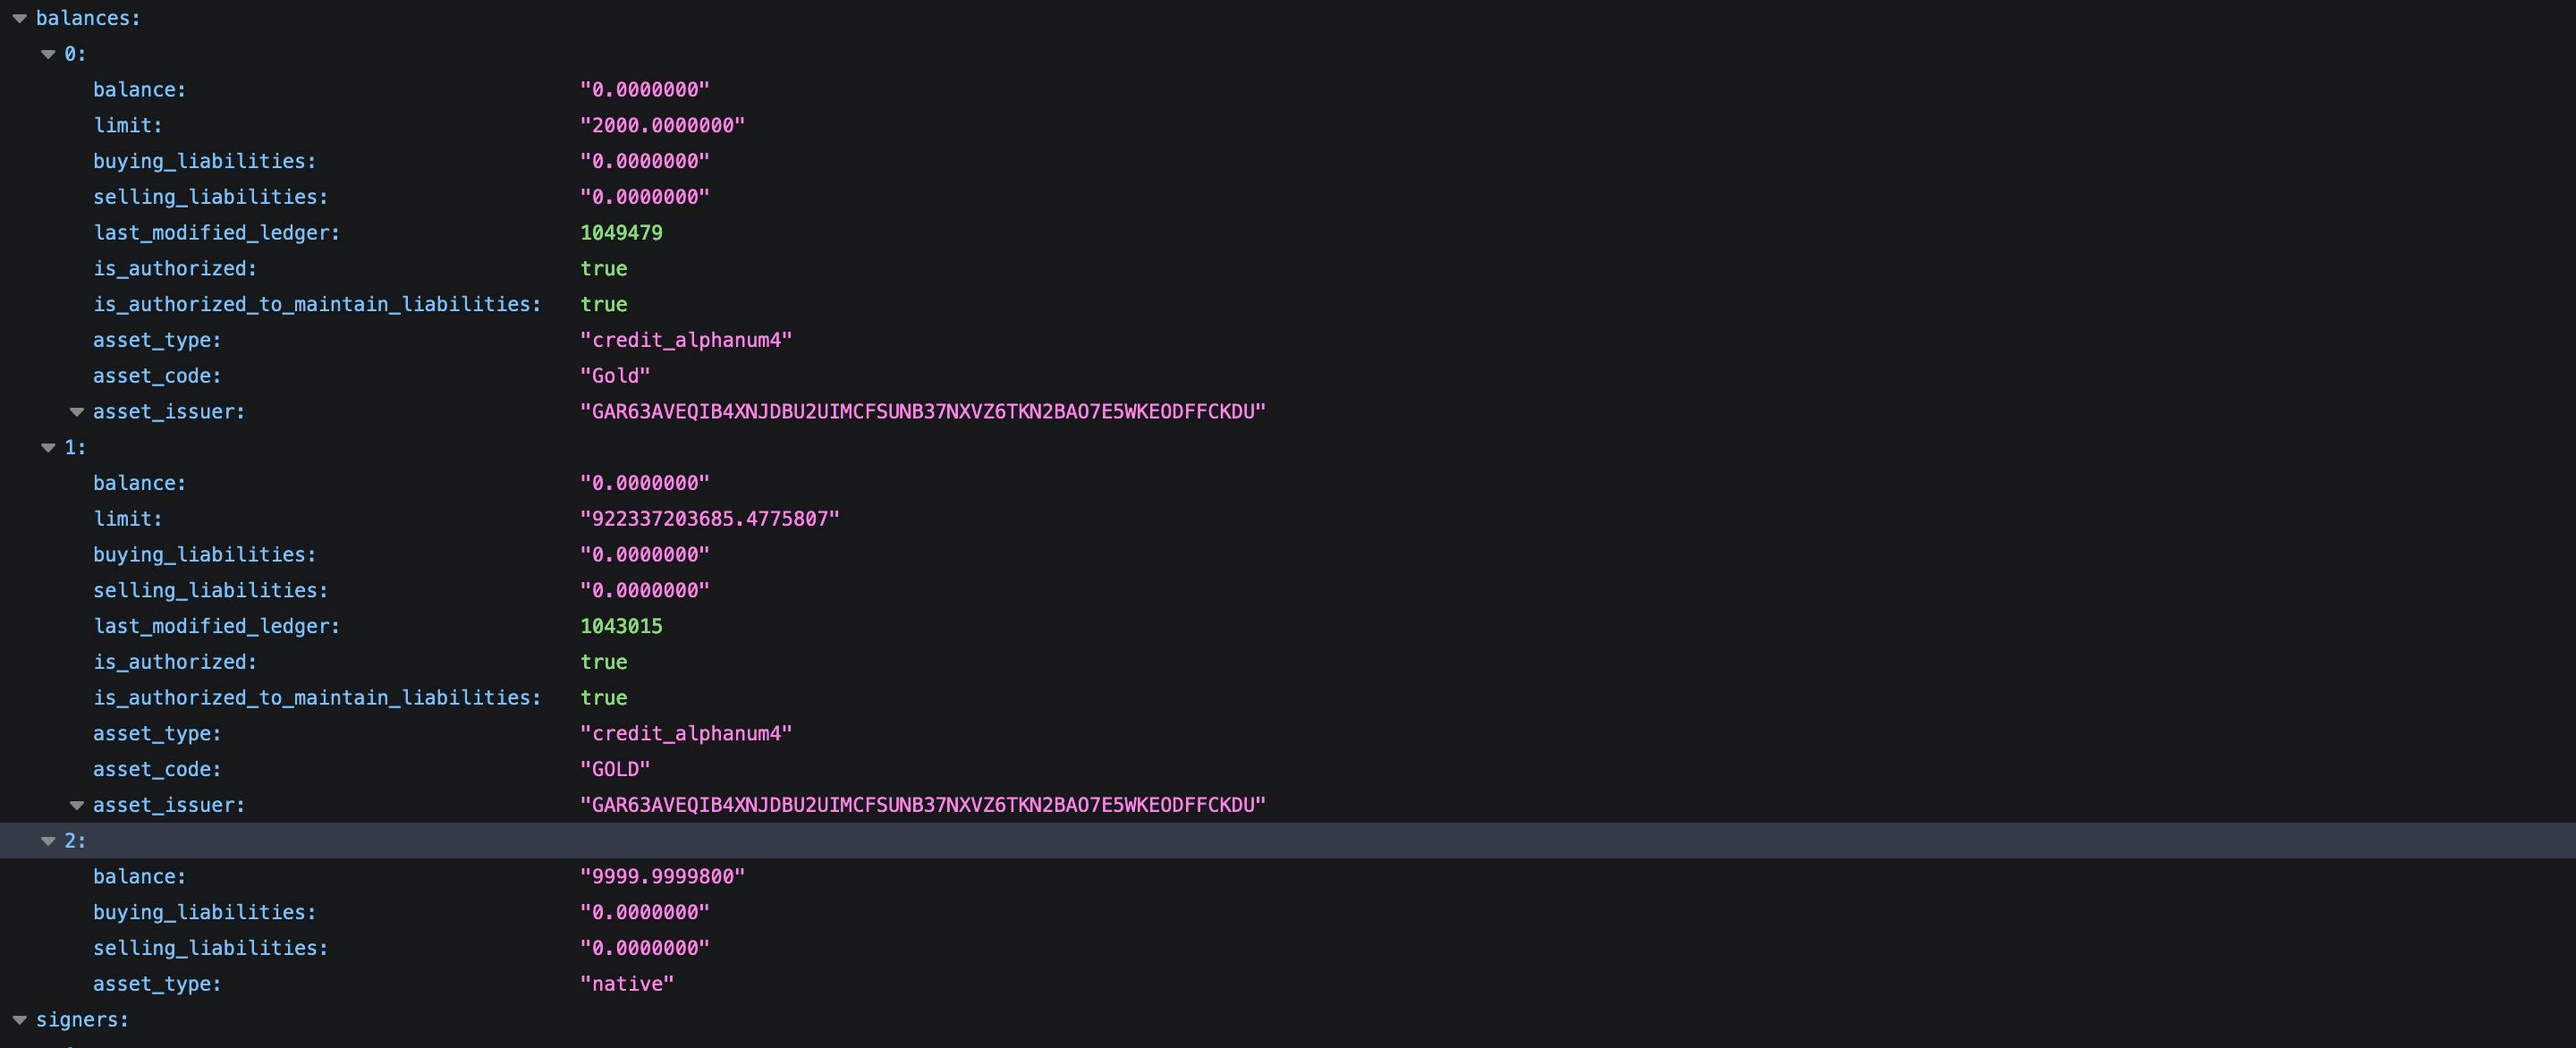
Let's go to the Operation Type field and select Change Trust option from the dropdown. On the Asset field, we named our asset "Gold" , added the issuer public Id, and added a trust limit of 2000. A trust limit of 2000 means we will create 2000 tokens when we submit the transaction.
Next, we complete the transaction by clicking the Sign in Transaction Singer button.
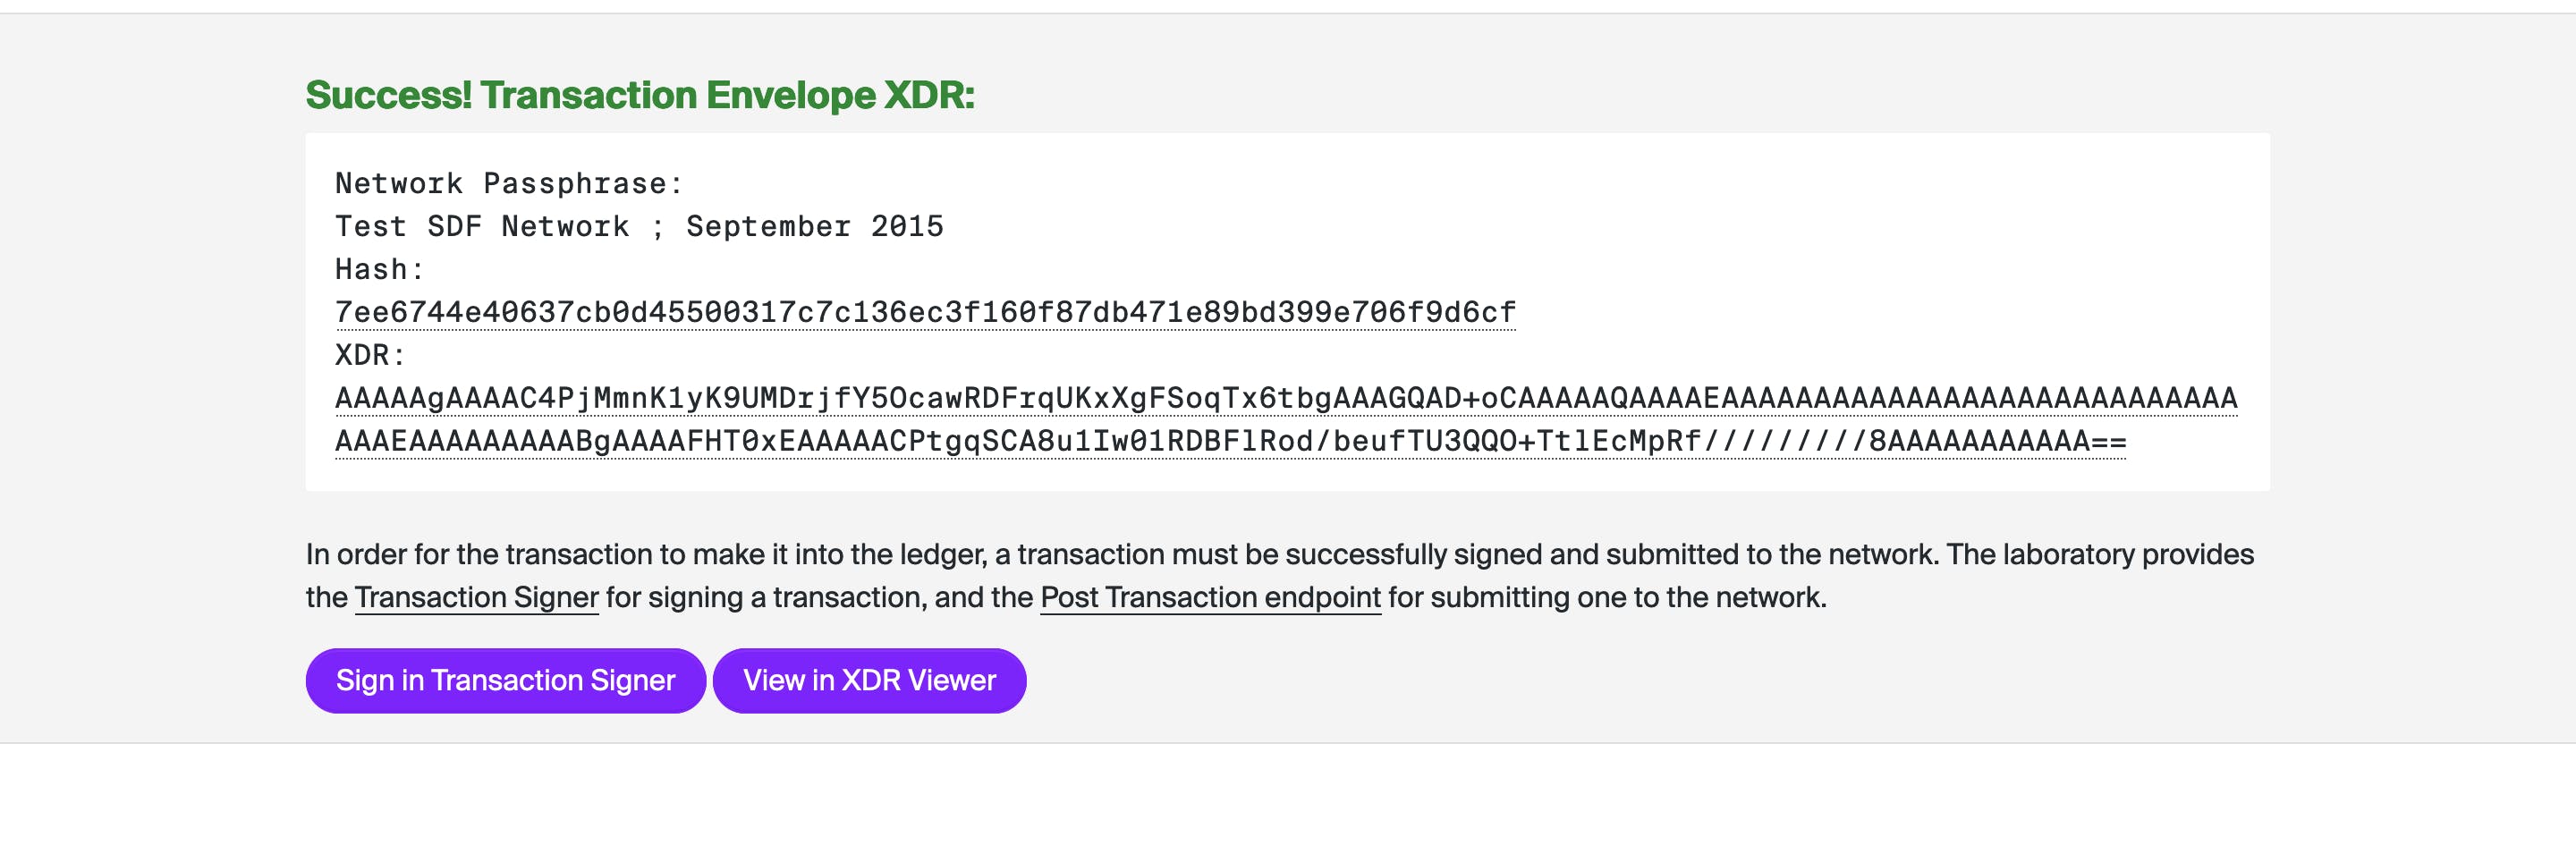
Lastly, we sign the transaction using the issuer's private key id and by clicking the Submit In Transaction Submitter button. When the transaction is successful 2000 tokens are generated and added to the Distributor's balance.
Step 3: Prevent the issuer from making more tokens
The goal of this step is to prevent the issuer from generating more tokens on the Stellar network. So basically this locks the issuer's account.
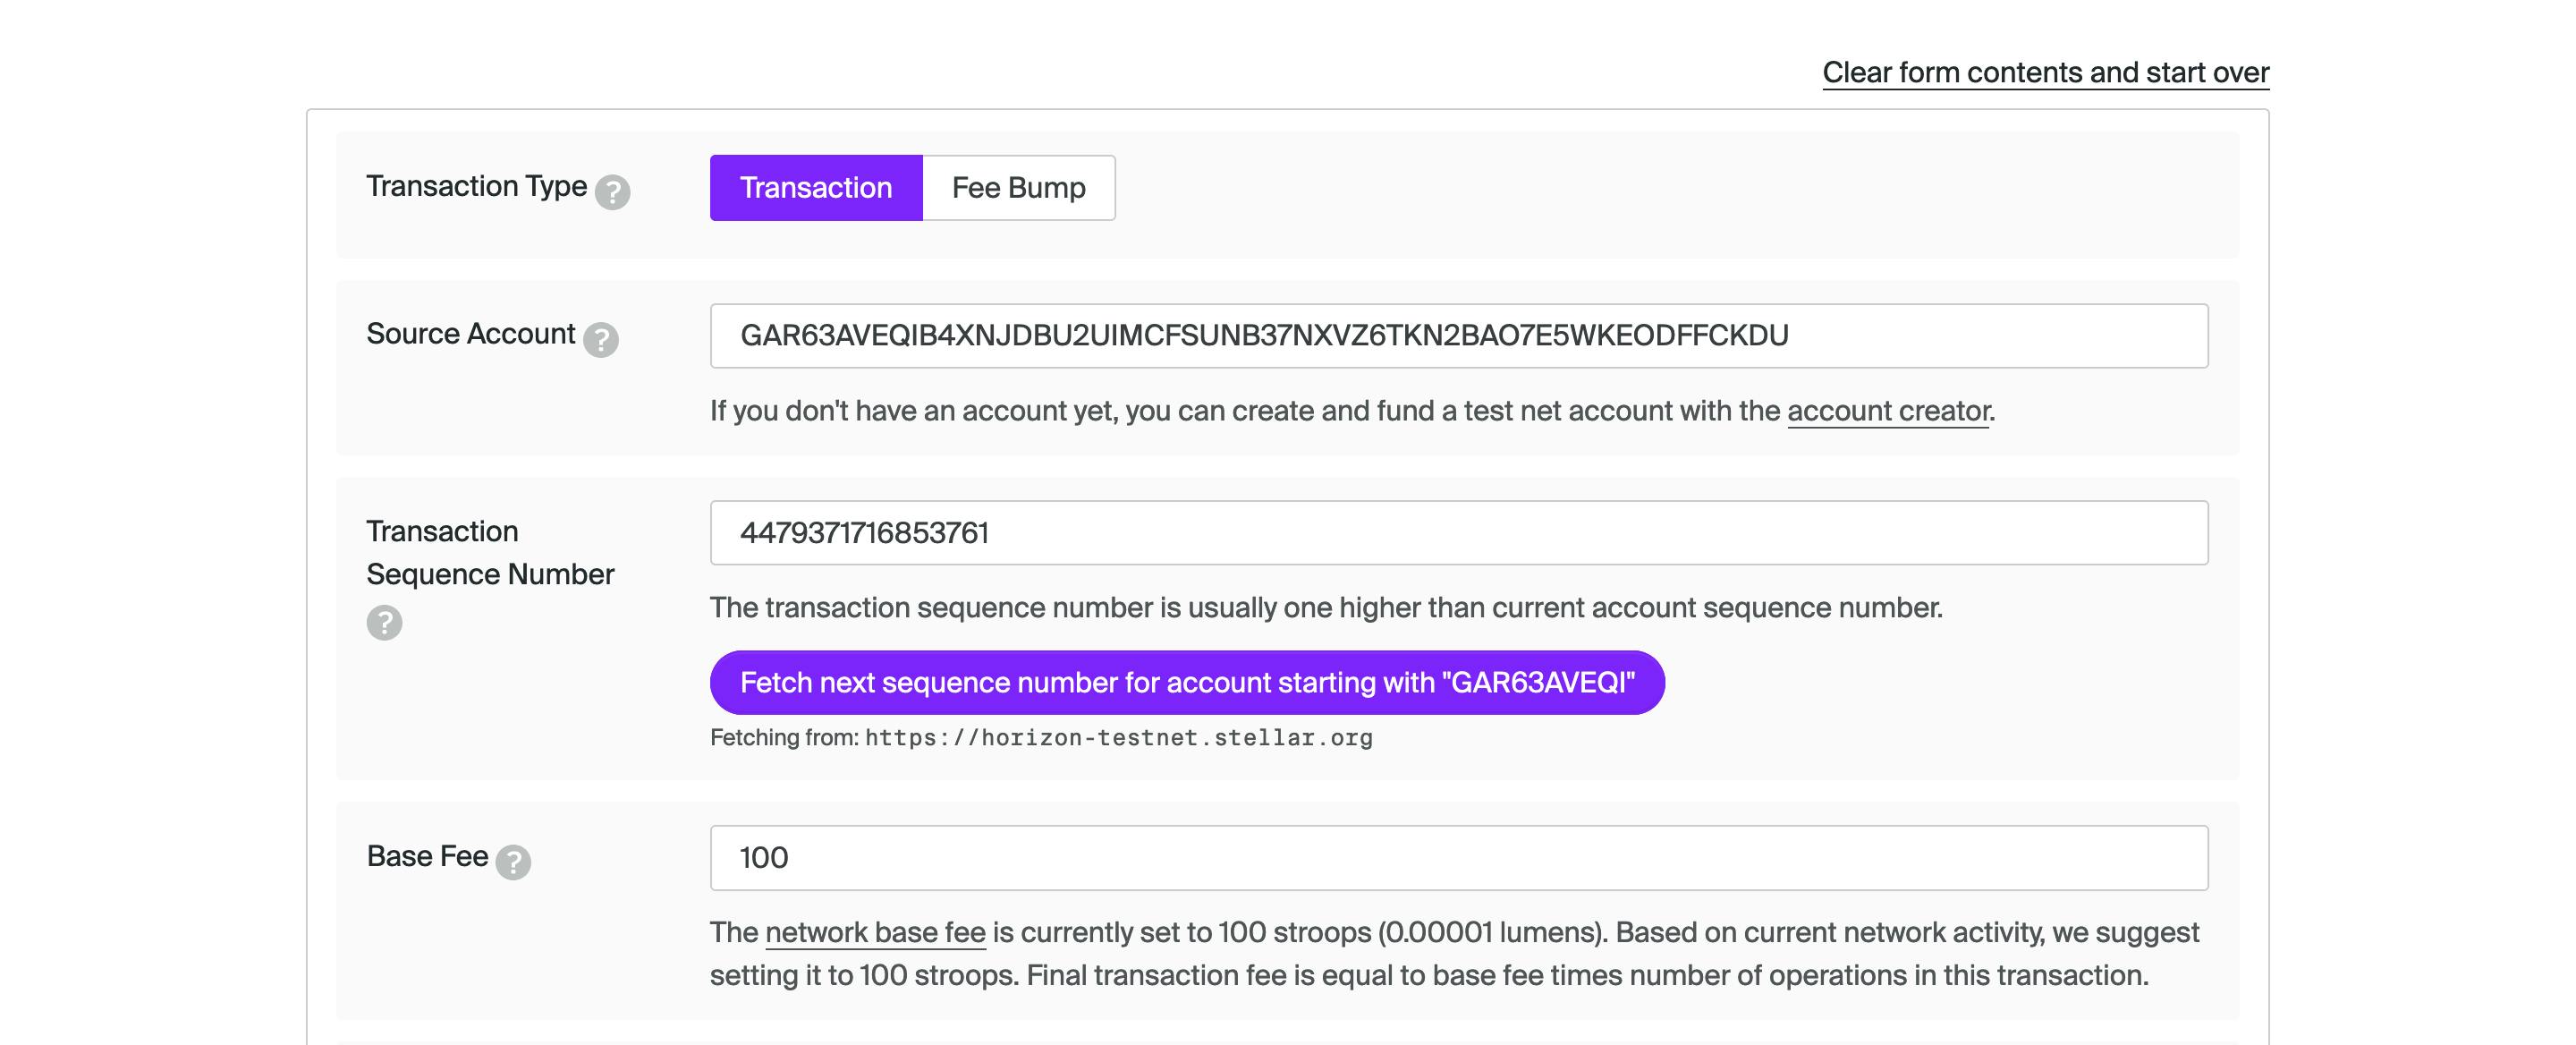
Firstly, we go back to the transaction builder page. Let's add the issuer's public key in the Source Account field and generate a transaction sequence number by clicking Fetch next sequence number for account starting with "XXXXXXXX" button.
We go on the Operation Type field and select the Set Options option from the dropdown.

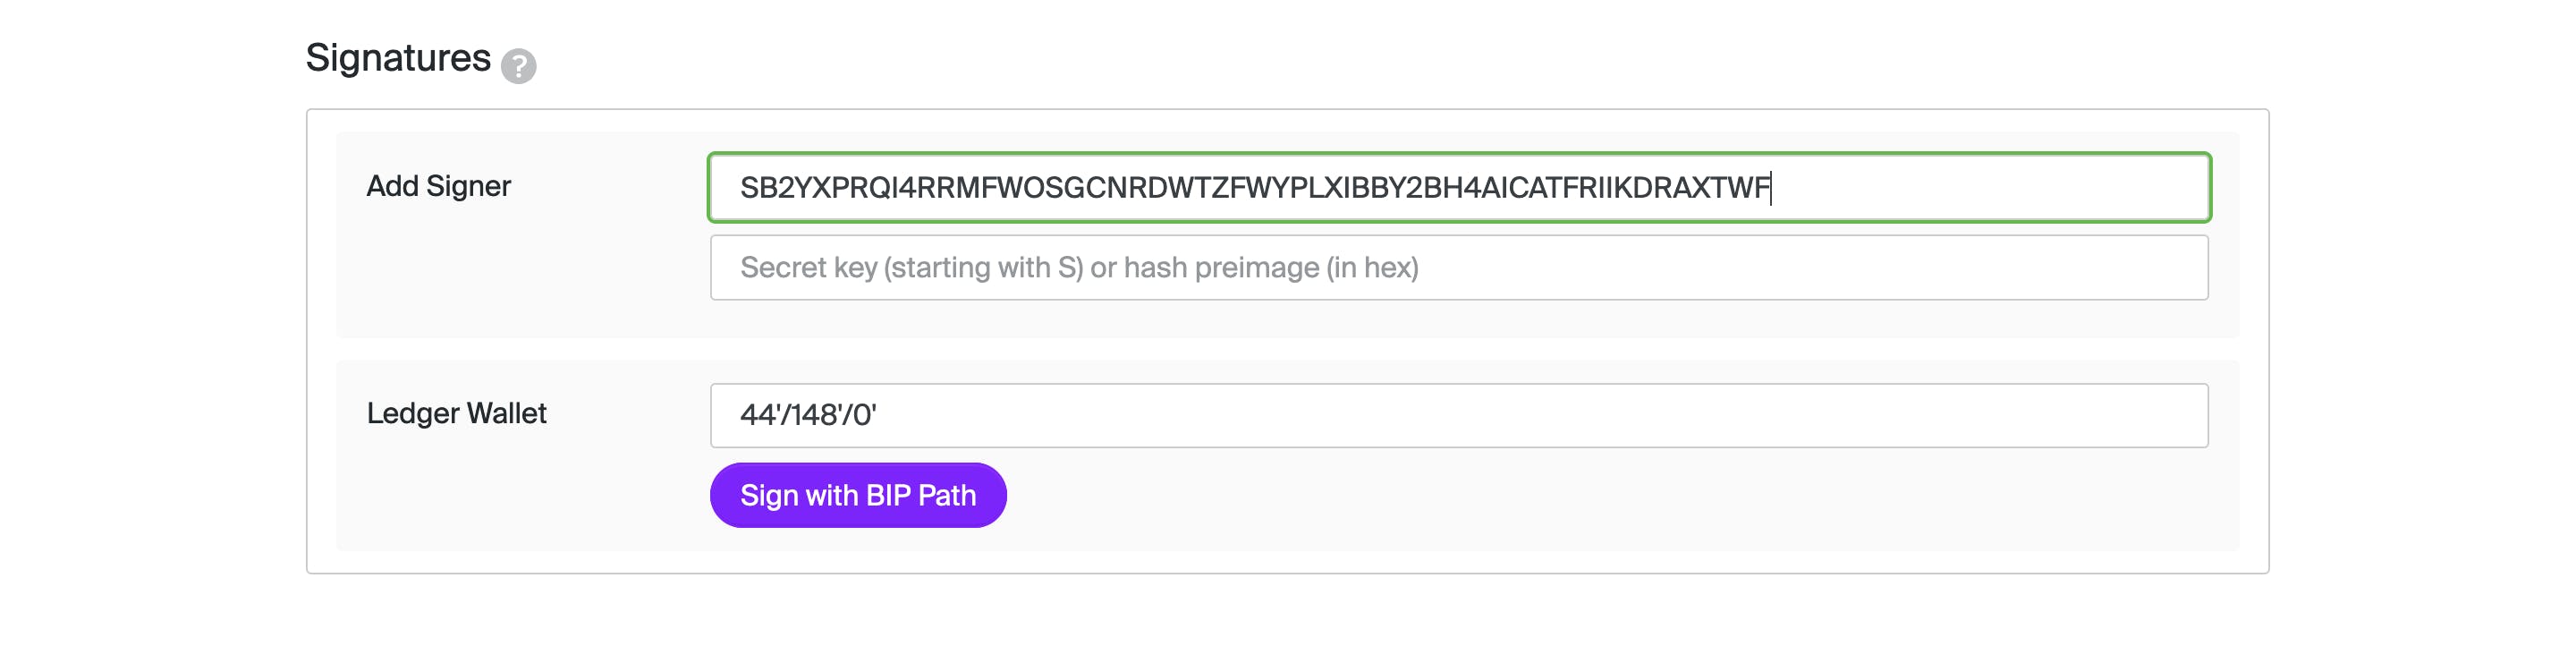
Let's go to the Master Weight field and add a value of 0 .Then we click the Sign In Transaction Singer button at the bottom of the page .

Lastly, we add the issuer's private key in the Add Singer field and finish off by clicking Submit In Transaction Submitter button at the bottom of the page.
Step 4: Distribution of the tokens
We have generated our tokens and everything is set up , finally, we need to be able to distribute the tokens. We can trade and convert our assets on the stellar network. Stellar offers a decentralized exchange and you can read more about it on developers.stellar.org/docs/glossary/decent..
Using this link horizon-testnet.stellar.org/accounts we can check out if we successfully generated the tokens.
You now have a understanding of how the stellar blockchain network works.
Where to go from here?! 😁 I suggest you start building a blockchain solution with the help of Stellar SDKs.
Thanks
Thanks to Stellar and the stellar developer foundation team!!
Thank you for reading this -Follow me on Twitter
Checkout my website.